

How to Make Homemade Whitening Toothpaste: Recipes & Risks
How to Make Homemade Whitening Toothpaste: Recipes & Risks
However, your teeth are not like your skin or your hair—enamel is a non-renewable resource. Once it’s gone, it doesn’t grow back. While kitchen staples like baking soda and coconut oil are touted as miracle workers on social media, using them incorrectly can lead to permanent damage.1 This guide explores the most popular DIY recipes, the science behind how they work, and what you must avoid to keep your smile healthy and bright.
Why People Switch to DIY Whitening
The move toward homemade oral care is usually driven by three factors:
- Cost: Standard professional whitening can cost hundreds of pounds, and premium toothpastes aren’t far behind.
- Ingredient Transparency: Many people want to avoid SLS (sodium lauryl sulfate), artificial sweeteners like saccharin, or preservatives like parabens.
- Perceived Safety: There is a common belief that if you can eat it, you can brush with it. As we will see, this isn’t always true for your enamel.
Natural ingredients like coconut oil and baking soda are the foundations of most DIY whitening recipes.
Popular Homemade Whitening Toothpaste Ingredients
Before you mix your first batch, it’s important to understand the “Big Three” ingredients used in almost every natural whitening recipe.
1. Baking Soda (Sodium Bicarbonate)
Baking soda is a mild abrasive.3 It works by physically scrubbing away surface stains from coffee, tea, or red wine. Because it is alkaline, it also helps neutralize acids in the mouth that cause tooth decay.
- The Risk: If used too aggressively or too often, its abrasive nature can wear down the enamel.5
2. Coconut Oil
Frequently used in “oil pulling,” coconut oil is rich in lauric acid, which has antibacterial properties. In a toothpaste, it acts as a binder to hold the powder together and may help reduce plaque-causing bacteria.
- The Risk: While safe, there is limited scientific evidence that it actually changes the internal color of your teeth.
3. Hydrogen Peroxide
This is the only ingredient in most DIY kits that actually “bleaches” the tooth. It creates an oxidation reaction that penetrates the enamel to lift deeper stains.
- The Risk: DIY concentrations are hard to control. Too much can cause chemical burns on your gums or extreme tooth sensitivity.6
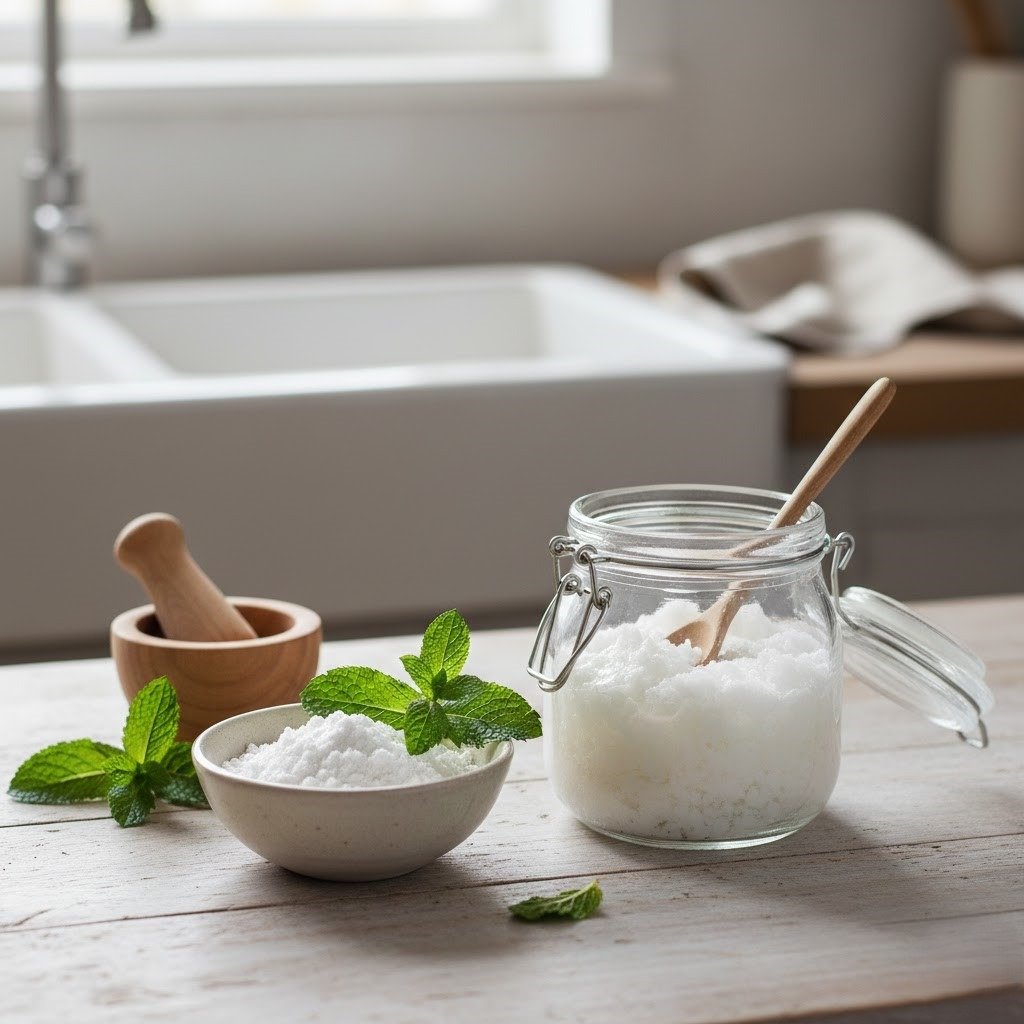
The Best (And Safest) DIY Recipe
If you are committed to the DIY route, dentists generally recommend a low-abrasion formula that mimics professional products without the harsh additives.
The “Gentle Bright” Recipe:
- 2 Tablespoons Coconut Oil: (Antimicrobial base)
- 1 Tablespoon Baking Soda: (Surface stain removal)
- 1–2 Drops Peppermint Essential Oil: (For flavor)
- Optional: A pinch of Stevia or Xylitol for sweetness (Xylitol actually helps prevent cavities).
Instructions:
- Melt the coconut oil slightly until it’s soft but not liquid.
- Stir in the baking soda until it forms a smooth paste.
- Add the essential oil and sweetener.
- Store in a glass jar and use a small wooden stick (not your toothbrush) to scoop it out to avoid introducing bacteria.
Comparison: DIY Ingredients vs. Dental Reality
| Ingredient | Claimed Benefit | Dentist’s Warning |
| Lemon Juice | Natural Bleaching | Extremely Acidic. Will dissolve your enamel instantly. |
| Activated Charcoal | Absorbs Stains | Highly Abrasive. Can wear down enamel and make teeth look yellow. |
| Apple Cider Vinegar | Removes Plaque | Acidic Hazard. Can lead to rapid enamel erosion. |
| Strawberry Mash | Malic Acid Whitening | Sugar & Acid. Can cause cavities if left on teeth. |
5 Hidden Dangers of Homemade Whitening Toothpaste
While “natural” sounds safe, the science of oral health is precise. Here is why homemade whitening toothpaste can be bad for your teeth if you aren’t careful:
- Enamel Erosion: Most DIY ingredients rely on abrasion.8 If your paste is too “gritty,” you are essentially sandpapering your teeth.
- Lack of Fluoride: Fluoride is the only ingredient proven to remineralize enamel and prevent cavities. Almost no DIY recipes include it.
- Gum Irritation: Ingredients like essential oils or high-concentration peroxide can cause redness, swelling, and pain in the soft tissues.9
- Bacterial Growth: Homemade pastes don’t have preservatives. If you dip a wet toothbrush into the jar, you are introducing bacteria that will thrive in the coconut oil base.
- Rebound Yellowing: If you scrub away your enamel, the yellowish dentin underneath becomes more visible.10 You might end up with teeth that look more yellow than when you started.
Check out our guide on: Does Purple Whitening Toothpaste Actually Work?
How to Whiten Safely at Home
You don’t have to give up on natural care. Instead, follow these professional tips to bridge the gap between “DIY” and “Dental Grade”:
- The Two-Week Rule: Use your homemade abrasive paste for two weeks to lift surface stains, then switch back to a fluoride-based “enamel repair” toothpaste for a month.
- Rinse, Don’t Scrub: After using a baking soda paste, rinse thoroughly with water.11 Don’t brush too hard.
- Consult a Professional: Before starting any whitening regimen, ensure you don’t have underlying issues like cavities or gum disease, which whitening can exacerbate.12
FAQ: Homemade Whitening Questions
Can I use baking soda every day?
No. Most dentists recommend using a pure baking soda paste no more than 1–2 times per week to prevent excessive wear on your enamel.13
Is charcoal toothpaste better than a baking soda mix?
Actually, charcoal is often more abrasive. Many dentists advise against charcoal because it lacks the clinical evidence of safety that baking soda (in low concentrations) has.14
Will coconut oil pulling whiten my teeth?
Oil pulling may help remove plaque and bacteria, which prevents new stains from forming, but it does not have the chemical power to whiten the actual tooth structure.15
Is lemon juice safe for whitening?
Never use lemon juice or any citrus on your teeth. The acidity is high enough to dissolve your enamel, leading to permanent sensitivity and decay.
Conclusion: The Final Verdict on DIY Whitening
Homemade whitening toothpaste can be a useful, cost-effective tool for managing surface stains, but it is not a replacement for professional dental care or fluoride-based hygiene. By using mild abrasives like baking soda in moderation and avoiding acidic “hacks” like lemon juice or vinegar, you can maintain a brighter smile without sacrificing your long-term health.
- Moderate Use: Use abrasives sparingly (1–2 times a week).
- Avoid Acid: Keep citrus and vinegar away from your enamel.
- Prioritize Enamel: Once enamel is lost, it cannot be recovered.16
- Don’t Forget Fluoride: Use a fluoride rinse or toothpaste to keep teeth strong.